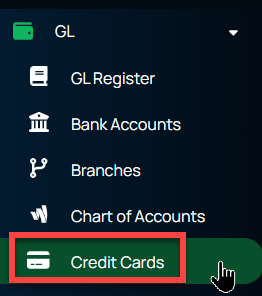
Use the reconcile feature to view and mark off all transactions (corporate card payments against bills/receipts) made using the credit card for a given timeframe.
- From the main menu, navigate to GL>Credit Cards

- In the Credit Card column, click on the credit card you wish to reconcile
- Click the Reconcile button
- This will display the Reconciliation window. Review the information below for an explanation of the meanings of each section. Enter information or make any changes and click Save.
- Reconciliation Period — This dropdown defaults to what was entered when creating the credit card; users can change it to any of the other options available (weekly, monthly, bi-monthly, quarterly, semi-annually, annually).
- Ending Date — This helps determine what transactions to show, only displaying those transactions that have occurred between the last reconciliation date and the date entered here.
- Ending Balance — Enter the balance as of the ending date entered. This number should be a negative since Credit Cards are in a state of liability, thus negative when reconciling.
- Service Charge — Enter any service charges associated with the card during that period.
- Service Charge Account — This is the GL account to post the service charges to.
- Interest Accrued — If there was any accrued interest associated with that card during that period.
- Interest Account — This is the GL account to post the interest against.
- After entering this information, you are redirected to the reconciliation screen. This screen displays all transactions that have been made with the GL account that is attached to the credit card.
These transactions are separated into two sections:
- Transactions that represent payments being made with the credit card
- Transactions that represent payments being made to the credit card balance.
Each transaction displays this information about the transactions:
- Date — Date that the transaction was created
- Number — This is a link to the check
- Vendor — If the transaction was a vendor payment, this is the vendor’s name
- Memo — If a memo has been created for the payment or journal entry, it is displayed here
- Amount — Displays the amount for the transaction that reduced or increased the balance for that credit card
- Using the checkbox next to each transaction, mark each transaction on this screen by comparing it to the credit card statement, ensuring that all the transactions recorded on the statement have also been recorded in Managely. You can mark all transactions at once or one transaction at a time. Marking a transaction affects the totals for the reconciliation helping ensure that the transaction totals add up to the ending balance entered in the initial fields before starting the reconciliation.
As you mark each transaction, the top portion of this screen tallies the totals. Review the information below for an explanation of the meanings of each section.
- Beginning Balance — This is the balance of the credit card when initially created or the ending balance of the previous reconciliation if a reconciliation has already been created.
- Checks & Payments - This sums the total of Checks/Payments being marked.
- Deposits & Credits - This sums the total of Deposits/Credits being marked.
- Cleared Total — This sums the total transactions being checked. Any transaction that represents a payment made or money being removed from the credit card balance is represented as a negative amount, while transactions that represent a payment made on the credit card balance or adding money to the credit card balance as a positive amount.
- Cleared Balance — This is the beginning balance plus the cleared total.
- Difference — This represents the total difference between the beginning balance and the cleared balance (regardless of the cleared balance).
- Ending Balance — Enter the balance as of the ending date entered. This number should be a negative since Credit Cards are in a state of liability, thus negative when reconciling.
- Service Charge — This displays the total service charge amount entered when starting the reconciliation.
- Interest Accrued — This displays the total interest accrued amount entered when starting the reconciliation.
- Finishing Reconciliation
Finish Later - Save your progress and finish the reconciliation later
Finish - Complete the reconciliation after the transactions checked in the reconciliation match the ending balance initially entered when creating the reconciliation.